Monday, August 31, 2009

Our Unusual Visitors

Hubs told me an unusual event that occurred just a few days ago. He had gone into town with both of the kids. I was at work. On his way home, some horses appeared out of nowhere and followed his truck from the main road, down the driveway, and all the way to the house.

They got really close to the house. The horses had moved off a bit from the house by the time hubs got outside with the camera. After eating some of our grass, the 3 horses left just as mysteriously as they had arrived.

Weird, huh?

Wok's For Dinner: Barbecues

I had never heard of "barbecues" until I met my husband's family in Minnesota. It was then that I learned that barbecues were simply sloppy joes. This particular version comes from my husband's Aunt Eunice.

Barbecues

Ingredients:
1 1/2 - 2 lbs ground beef (I just used 1 lb)
onion, chopped
bell pepper, chopped (not in original recipe, but I added it)
1 can tomato soup
1 Tbsp Worcestershire sauce
1 Tbsp ketchup
1 tsp mustard
1 Tbsp vinegar

Directions:
Brown ground beef, onion and bell pepper. Add remaining ingredients, heat and serve. If freezing: let mixture cool after cooking. Place in quart-size freezer bag, or gallon-size if you need the extra container space. Squeeze out air, seal and freeze. Thaw 24 hours in refrigerator. Heat in microwave and serve.

I thought it tasted good, and the kids ate their barbecues really well. Especially my daughter. She made some sort of cookie monster sound while eating hers. I guess that means that she enjoyed it!

Sunday, August 30, 2009

Menu Plan Monday: 8/31-9/6

I'm rather pleased with this week's menu, especially since we'll be going camping Labor Day weekend, and I still included the vacation days in my menu planning, instead of just settling on hot dogs & hamburgers like my pre-menu planning days.

Monday--Barbecues, French Fries, Cantaloupe, Pepper Poppers
Mondays are typically our "Family Home Evening" nights, but the Vikings game happens to be on TV on this particular Monday night, so we bumped our FHE night up one day and had it tonight instead. We made it a family movie night and a cartoon movie.

Tuesday--Taco Casserole, Squash, Grapes

Wednesday--Pineapple Ginger Chicken with Sesame Noodles and Sautee'd Cabbage

Thursday--Baked Pork Chops With Apples (from Taste of Home Holiday: Thanksgiving 2008), Acorn Squash, Mixed Vegetabls

Friday--Chicken Tacos, Squash

Saturday--Cobb Style Chicken Sandwiches, Great Northern Beans, Corn

Sunday--Grilled Italian Chicken, Green Beans, Italian Pasta

For hundreds of menu plan options, visit OrgJunkie.com!

Wok's For Dinner: Tomato Pasta Bake

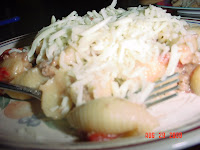
Oops--I apologize for the blurry pic. I should have taken a closer look at the image on my digital camera.

This is a meal that my friend Didi gave me many years ago. Our church had a date night recipe swap activity, and this is a meal that she brought for her date. It looked so good; I just had to have the recipe. I don't remember actually sampling it, but it was a simple meal that was very appealing and has become a family favorite ever since (the kids especially love the cheese :).

Tomato Pasta Bake

Ingredients:
8oz cooked pasta (I used shell pasta)
1lb ground beef
1 can cream of mushroom soup
1 can diced tomatoes
8 oz shredded mozzarella

Directions:
Preheat oven to 350 F. Brown meat; drain. In a large casserole dish, combine pasta, beef, tomatoes and cream of mushroom. Bake for 25 minutes. Remove from oven, sprinkle liberally with cheese and bake 5-10 minutes, or until cheese melts. If freezing: Combine all ingredients into a disposable baking dish and sprinkle with cheese. Cover with foil and freeze. OR Combine all ingredients except cheese and put into a gallon-size freezer bag; freeze. Thaw in fridge 24-36 hours (whether you froze it in a disposable baking dish or in a freezer bag). Bake in oven as directed above.

I took the lazy man's way of preparing this meal. I made it into a freezer dish but put it in the gallon-size freezer bag. We had such a busy day on Saturday, so I didn't even bother baking it. I just put it in the microwave for 3 minutes, stirred, then microwaved an additional 2 minutes. After putting some on everyone's plates, I sprinkled the cheese on top. The kids really enjoyed this meal, especially the cheese part. :)

Friday, August 28, 2009

Peeling A Potato (The Easy Way)

My friend Mary shared this video with me about an easy way to peel a potato. It's a YouTube video with actress Dawn Wells (MaryAnn from Gilligan's Island!). Looks pretty easy, and I just may have to give it a try next time I want to make mashed potatoes.

Click here to watch Dawn Wells do her magic. :)

Thanks, Mary!

Thursday, August 27, 2009

Friday Night = Date Night

I'm a firm believer that it's important to have one-on-one time with your spouse in order to keep your marriage healthy. For me, it's very easy to get caught up in the day-to-day busyness of life, between work, kids, preparing dinner, taking time for my Heavenly Father with scripture study & prayer, as well as taking time for me. In that mix of balancing my life, I realize the importance of also spending time with my husband. Although he encouraged me to start this blog, he isn't too keen on me spending the entire evening on my computer. Unfortunately, the ONLY time I can devote to the blog is in the evening after the kids go to bed. But understanding my husband's need for quality time with him, I do my best to limit my PC & blogging activity and up the "little things" that I know my husband likes.


We also try to devote at least one Friday night each month to just each other. Sometimes it ends up being a Saturday afternoon, depending on what's going on. The goal is simple: Just us. No kids. No chores. No to anything that will keep us from inadvertently focusing on each other.


It's on these nights that we'll send the kids to their grandparents' house, or my husband's younger brother will come over to the house & babysit the kids while we go out.


Usually, we don't spend a lot of money. If we go to a movie, which happens maybe once or twice a year, we'll go to a Saturday afternoon matinee when ticket prices are cheapest. We'll share a tub of popcorn and a drink, instead of buying individual ones. My husband prefers cola-type sodas, but I do not drink caffeinated beverages, but since he loves me, he'll happily share a lemon-lime version instead.


Other dates might simply be cuddling up on the couch at home watching a movie and giving each other foot massages. I bought a good foot massage lotion that smells like peppermint. I love it! My husband gives the best foot massages, and with this peppermint lotion, my feet come out smoother than a baby's bottom! And they're still just as soft the next day.


Last month, we went on a date night that was completely different than any we had done before--a ghostwalk. A friend of ours is the curator of a local museum, and she told us about a ghostwalk one of the local paranormal societies was doing. I'm an absolute fan of Syfy's Ghost Hunters (TAPS)and Ghost Hunters International, the only shows I care to watch, otherwise, I usually don't watch TV.


Anyhow, we were really intrigued and, at the very least, it sounded like a great opportunity to get some exercising. Our "date night" came, and we went to the museum downtown. Along with about 30 other people, we took a tour of the downtown section and learned a lot of history, including the "ghostly" activity in the historical buildings and homes.


I managed to capture a picture of a ghost!!!

It was a fun and informative evening, and we really enjoyed the opportunity & blessing it was to have some time together. Even with the large group of people, it was still nice to spend an evening together.

Wok's For Dinner: Family-Size Baked Burrito

This has to be one of our favorite family meals. It came out of a Pampered Chef: Season's Best cookbook that I got for $1 a few years ago. I think that I've made it a bit differently each time we've had it, but it always comes out really good. This is the version that I made tonight:
Family-Size Baked Burrito

Ingredients:
2 small tomatoes, thinly sliced
3 cups cooked chicken, shredded*
1 tsp onion powder
1 Tbsp lime juice
1 Tbsp chicken taco seasoning mix
1 Tbsp garlic powder
3 Tbsp salsa
1 shredded cheddar cheese
4 burrito-size flour tortillas
1/2 can (9oz) bean dip
Toppings: shredded lettuce, sliced olives, sour cream

Directions:
Preheat oven to 425 F. Mix chicken with onion powder, lime juice, seasoning mix, garlic powder and salsa. Microwave chicken mixture 3-4 minutes or until hot, stirring occasionally.
Arrange tortillas in an overlapping circular pattern on a large pizza stone (you could use a cookie sheet as well), covering entire surface of baking stone. Tortillas will extend off edge by a few inches.

Starting in the center, spread bean dip over tortillas. Spoon chicken mixture over bean dip and cover with 3/4 cup of cheese.

Fold edges of tortillas up over chicken mixture in an envelope pattern. Arrange sliced tomatoes in rows over top of burrito. Sprinkle remaining cheese over top. Bake about 18 minutes or until cheese is melted and edges are browned.

Cut into rectangles; serve with assorted toppings and enjoy!

*I cooked my chicken up on my August freezer meal cooking day. To freeze, I simply put it in a food saver bag and sealed it up before placing in the freezer. You could use a quart- or gallon-size freezer bag, just make sure to get the air out before sealing it. I let the chicken thaw 24 hours in the fridge.

Wednesday, August 26, 2009

Wok's For Dinner: Stuffed Bell Peppers

A classic traditional meal, Stuffed Bell Peppers reminds me of my mother's cooking. I never got her recipe before she passed away, but I did get the recipe from my aunt, which is the closest I could get to my mom's version. This definitely is a recipe that you will need to devote some time to. You could prepare some of it ahead of time--brown the meat & cook up the rice, then store in the refrigerator, for instance.

Stuffed Bell Peppers

Ingredients:
6 large green bell peppers
1 lb ground beef (I used ground turkey; you could substitute the morningstar farms meatless crumble stuff)
1 medium onion, chopped
1 tsp salt
1 Tbsp garlic powder
1/4 tsp ground pepper
2 cups cooked rice
1 can tomato sauce
1 can diced tomatoes
1 can stewed tomatoes

Directions:
Preheat oven to 350F. Cut thin slice from stem end of each pepper, remove the seeds & membranes. Immerse peppers in a large pot of boiling water; boil for 5 minutes; drain. Meanwhile, brown ground beef (or ground turkey or meatless crumble) with onion, salt, garlic powder & ground pepper in a skillet; drain any excess grease. Stir in rice and tomato sauce. Stuff the bell peppers with the meat mixture. Put the stuffed bell peppers into a deep baking dish. Cover with tomatoes. Cover baking dish with foil or a lid if your baking dish has one. Bake in oven about 45 minutes.

Hubs had a meeting tonight, so I don't quite know yet what his verdict on this meal was. He told me that he planned on getting Taco Bell for dinner, until he saw me making the stuffed peppers before he left. He did make a comment about how good everything was smelling, so we'll see if he brings home the fast food or if he'll hold out for one of his favorite meals that I rarely make. :) I didn't give the kids any of the bell pepper, knowing they wouldn't eat such them, so they had just the rice, ground turkey & tomatoes. I did sprinkle some mozzarella cheese on top of theirs. My son picked at his plate, saying it was "too hot." He decided to save his supper for his lunch tomorrow. On the other hand, my daughter loved hers! She ate about half, but wasn't really hungry enough to finish up. She, too, decided to save hers for her lunch tomorrow. What a sweet feeling I had hearing both of my children saying that they wanted to save their leftover meal for their lunch too!

Tuesday, August 25, 2009

Freezer Meals: Recipes That Work

I'm not sure what the official title of this type of freezer meal would be. So I'll just label it what I call it here at home:

Make-Ahead Meal

This wouldn't be a true freezer meal. In fact, it doesn't get frozen at all. A good example of a Make-Head Meal is the Lemon Chicken that we had tonight. Simply put, you make your meal ahead of time, store it in the fridge, and heat it up on serving day.

This is the perfect kind of "freezer meal" for folks who don't have time to devote to a full day of cooking, but still want to get an edge on their meals for the week. A great way to do this is to spend an evening making a few meals for the week, including supper for the same cooking day. You could have a meal going in the skillet/saucepan on the stove, a second meal in the oven, and a third meal in your slow cooker. Eat one of the meals, then store the other two in the fridge. You'll have two extra days' worth of meals that will be a snap to just heat and serve. For the Lemon Chicken we had tonight, all I did was put it in a medium bowl and heat it in the microwave for about 5 minutes. It gave me enough time to slice a large cucumber and a few peaches. I had supper on the table in record time--before 6PM! Which meant we were able to put the kids to bed 30 minutes early!

Now if I could only get them to fall asleep...! ;-)

Wok's For Dinner: Lemon Chicken

A simple little meal for our family of four. This was supposed to be a freezer meal. I did cook it up this past Saturday. But since I've never frozen cooked rice (or even uncooked rice, for that matter), I was a little nervous that it wouldn't freeze well. So instead I just stored it in a gallon-size storage bag in the fridge and heated it up for tonight's dinner.

Lemon Chicken

Ingredients:
4 boneless, skinless chicken breasts, cut in strips
2 garlic cloves, pressed
1 medium onion, chopped
2 Tbsp olive oil
1 Tbsp cornstarch
1 can chicken broth (I used 2 cups homemade chicken broth)
2 Tbsp lemon juice
1/2 tsp grated lemon rind, optional
1/2 tsp salt
3 Tbsp chopped parsley, or 1 1/2 Tbsp dried parsley
1 to 1 1/2 cups rice

Directions:
Saute' chicken, garlic & onion in olive oil until chicken is lightly browned, about 5 minutes. Stir in cornstarch and cook 1 minute. Add broth, lemon juice, rind, and salt. Bring to a full boil. Stir in rice. Cover and simmer on low heat for 15-20 minutes or until rice is cooked through.

Everyone loved this meal, even my husband who isn't a big lemon fan. My daughter, who recently decided that she loves chicken (as long as I don't cut it into tiny pieces), was very pleased with herself for eating her chicken.

Now if I can only muster up enough courage to make this as a true freezer meal next time...or maybe not. It was delicious as it was!

Monday, August 24, 2009

Wok's For Dinner: Sticky Chicken

This was a freezer meal that I made in July. It didn't look so pretty after being frozen for a month, so I didn't take a picture of it. I got the recipe from the Taste of Home: April & May 2009 magazine.

Sticky Chicken

Ingredients:
I used 4 boneless, skinless chicken breasts for this meal, so I cut the rest of the ingredients listed below in half
16 boneless, skinless chicken thighs, abought 3 lbs
1/2 cup your favorite barbecue sauce
1/4 cup reduced-sodium soy sauce
1/4 cup red wine vinegar
1/4 cup liquid honey or maple syrup
1 Tbsp chili powder
1 Tbsp Dijon mustard
1 Tbsp grated gingerroot (I used ground ginger)
2 tsp minced garlic
1 tsp ground cumin
1 Tbsp cornstarch

Directions:
Preheaet oven to 400F. Spray a 9x13-inch baking pan with cooking spray. Arrange chicken thighs in pan in a single layer. Whisk together all sauce ingredients in a medium bowl. Pour evenly over chicken. Turn pices to coat both sides with sauce. Bake, uncovered, for about 40 minutes, or until the chicken is no longer pink in the center. Remove chicken from pan and keep warm. Carefully pour sauce from pan into a small pot. Bring to a boil over medium-high heat. Combine cornstarch with an equal amount of water and mix until smooth. Add to the sauce. Cook until sauce is bubbly and has thickened, about 1 minute. Serve hot chicken with extra sauce on top.

Sadly, the only person who really enjoyed this meal was our daughter. She chowed down on hers and even had seconds, repeating, "Mmm, I love chicken!" the whole time. I had to convince my son to eat 3 bites, but he's not a big chicken eater, so that was no surprise. I thought it was "okay." A little spicy. This was a freezer meal from July. The chicken and sauce definitely didn't look anything like the picture in the magazine, even after cooking it up before I froze it. It looked even worse after thawing it and didn't look any better after heating it in the microwave. Hard to describehow the sauce looked--kind of grainy, I suppose. Hubs said that it was too sharp.

I'm still interested in making this again, but perhaps another version of the recipe. Or maybe it'd be better eating it fresh-made instead of as a freezer meal. I'll just have to keep my eyes peeled for a different recipes. Anyone got any suggestions?

Sunday, August 23, 2009

Wok's For Dinner: Shrimp & Broccoli With Pasta

Disclaimer: Sorry, folks for those of you receiving this through Feedburner. I typed the title and accidentally hit "enter" so you may have received this in your inbox with nothing aside from the title. Oops!

I served up this meal on my August freezer meal cooking day. The orginal recipe came out of the Taste of Home: Simple & Delicious May/June 2009 magazine. Utilizing what I had on-stock and knowing my family's tastes, I made several modifications to the original recipe, and this is what I came up with.

Shrimp & Broccoli With Pasta

Ingredients:
8oz uncooked spaghetti pasta
1 Tbsp olive oil
8oz frozen broccoli
1 garlic clove pressed
8oz frozen carrots
1/2 lbs cooked large shrimp, peeled & deveined
1/2 tsp salt
1/4 tsp pepper
1 bottle alfredo sauce
2 Tbsp grated Parmesan cheese

Directions:
Cook pasta according to package directions. Meanwhile, in a large skillet or wok, stir-fry broccoli & carrots in olive oil until crisp-tender. Add cooked shrimp and seasonings and cook until shrimp are heated through. Stir in alfredo sauce; simmer shrimp & pasta mixture for 4 or 5 minutes until heated through. Top with Parmesan cheese and serve.

Hubs and I really enjoyed this meal, but the kids LOVED it! My son asked for seconds and insisted he wanted more for breakfast. I managed to talk him into saving it for today's lunch. I'll have to remember to make this meal again in the near future. :)


Above: the kids loved, loved, LOVED this meal!

August OAMM Extravaganza: Recap

Well, I have survived another monthly freezer meal cooking event. Woohoo!

The day started out by taking my little girl to her first dance class. Her cousins were in a dance recital a couple months ago, and ever since, my Baby Girl has asked if we would let her dance like her cousins. She might be 2-years-old but acts like she's going on 5! We signed her up for a Saturday morning class for 3-5 year-olds. She'll be turning 3 in October, so the studio had no problem with letting her participate. Only problem is, she's the youngest one in the class! The studio had a little window where I could observe her. It warmed my heart seeing her pointing her toes in her little ballet slippers, twirl around, and hop across the floor. The class she is in will be learning ballet, jazz and tumbling. She took to her teacher immediately, and later in the day as she was coloring a picture, my little girl informed me that she was coloring a picture for her teacher! :)

After dance class, the kids and I headed to our local Angel Food Ministries host church to pick up our August food order. I started supplementing some of my grocery shopping with an A.F.M. order nearly a year ago, and I've been a loyal "shopper" ever since. For a detailed description of why I buy from A.F.M., please click here.

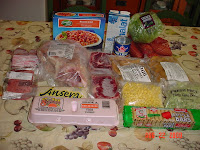
For just $30, I got a week's worth of food, a real time-saver for me because it's one week out of the month that I don't have to worry about digging through the sales ads and my coupons in order to find some deals on meals. Here's what I got:

1 regular/standard box--$30: 1.5lb ribeye steaks, 3lb split chicken breasts, 1lb boneless center cut pork chops, 2lb mac & beef dinner entree, 1.5lb breaded all white meat chicken nuggets, 1lb 80/20 lean ground beef, 1lb fish steaks, 1lb frozen corn, 1lb frozen baby lima beans, 1ct. iceberg lettuce, 2lb sweet potatoes, 15oz can pork & beans, 1lb rice, 32oz 2% shelf stable milk (makes a great food storage item!), 1 doz. eggs, 1pkg apple bars (similar to fig newton's)

In addition to the standard box, I also invested in a box of fruit & vegetables. Everything looked so fresh. I was ready to chop and dice it all up and eat it there & then as soon as I unpacked it all!

1 fruit/veggie box--$22: 3lb potatoes, 2lb yellow onions, 1 sleeve Romaine lettuce, 1 5oz bag Caesar salad croutons, 1 pint grape tomatoes, 1 head green cabbage, 1lb carrots, 4 peaches, 1lb white seedless grapes, 1 honeydew melon, 1 cantaloupe, 4 Valencia oranges, 4 large lemons

After putting away my A.F.M. order, I went to work on my freezer meals. You can view my August freezer meal plan here. At quarter to noon, my first two meals were cooking away. There were a three meals that I decided to make as a nonfreezer meal--Stuffed Pork Chops and Barbecued Beef Ribs. After some careful consideration, I just felt that the pork chops and ribs would turn out better cooked fresh the day we eat them. And as for the stuffed bell peppers, I simply just ran out of time to make them. There was one meal that I took off the menu completely--Hotch Potch. I needed a roast for this meal, and I thought that I had bought a roast when I made my menu, but come to find out, I did not buy the roast after all.

When all was said and done, I had made 24 freezer meals plus a fresh-made meal for our supper that same evening. It was a long day, but I feel like I accomplished a lot. Not just with the freezer meals (which will be great time-savers for me over the next month), but I also spent some quality time with my children in the morning, a lovely supper with them, and my daughter even helped me make some of the freezer meals. Not bad on this month's cooking extravagnza. :-D

Plus, even with all the meals that I made, I still have plenty of room in my freezer for lots more goodies (I'm thinking ice cream...it's bound to go on sale haha).

Menu Plan Monday--8/24-8/30

I had a great weekend making my freezer meals yesterday and cleaning the house today (yes, getting the house clean is an exciting accomplishment for me :). I'm looking forward to trying out a new set of freezer meals over the next month!

Monday--Stuffed Pork Chops, Salad, Corn
This is our weekly Family Home Evening night. We'll continue reviewing workbooks (letters, numbers, etc.) to help our son prepare for Kindergarten. We did that activity at last week's F.H.E. and both kids really enjoyed it.

Tuesday--Lemon Chicken, Cucumbers, Peaches

Wednesday--Stuffed Bell Peppers, Lima Beans, Honeydew

Thursday--Family-Size Baked Burrito, Carrot Sticks & Squash Salad, Grapes

Friday--Girls' night out (scrapbook night!) so hubs and the kids are on their own!

Saturday--Tomato Pasta Bake, Green Beans, Salad

Sunday--Slow Cooker Pork Chops With Apple-Cherry Stuffing (carry-over from July freezer meal menu), Salad, Grilled Summer Squash

For hundreds of menu plan options, visit OrgJunkie.com!

Saturday, August 22, 2009

Organic Garden Update

Out of all the carrot seeds we planted this Spring, only two actually sprouted and started to grow. We've been preparing our garden for our Fall planting, pulling up the old cucumber, squash & zucchini plants that were past their prime. Our poor two carrot plants had been overtaken by our watermelon plant, so we decied to pull the carrots up as well. I had my fingers crossed that they were ready for harvest. After all, I planted them in March.

Ironically, they were the absolute tiniest carrots I've ever seen! All leaves and hardly any orange carrot root. Oh well! They sure smelled like a carrot though. :) We're gonna try again and plant another variety in our Fall garden. I did some research and found out that carrots are fairly hardy and perform better in lower temperatures (unlike our NC 95 degree-summer this year). They also need space and overcrowding (ahem, ahem, watermelon) can cause the carrot roots to not develop well.

So now that I've learned a couple new tips about growing carrots, we'll see how it goes in our Fall garden!

A couple useful sites about carrot garden are here at eHow and also here at The Gardener's Network.

Thursday, August 20, 2009

Freezer Meals: Recipes That Work

Awhile back, I promised that I was going to start posting more information about freezer meals. It's taken me awhile to get going as I've tried to make a mental list of things I'd like to talk about. I recently received an email from a reader (thank you, Heather, I needed some inspiration tonight!) that reminded me about a freezer meal method that is very easy and convenient, but one that I haven't even taken the time to do.

Dump Recipes
I think the all-time easiest freezer meal has to be the one where you take some meat, dump it in a bag, dump in something as a marinade, and eventually dump everything into a pan to cook. Can it get any easier than that?

As much of a fan of freezer meal cooking as I am, strangely enough I rarely make dump recipes. Not that I'm opposed to them--far from it! It's mostly because of how my menu planning works. I use what works for me. I buy my meats ahead of time and stop when I have enough meat and freezer meal cooking day approaches, then I do a book all-day cooking event. I probably would make more dump recipes if I thought about it when I purchased the meat, but I usually just throw my meat purchases straight into the freezer, and as freezer meal cooking day approaches, I then make my menu based on my purchases. And so the opportuniy for making a dump recipe has, for me, passed.

But dump recipe may work out for you if you've considered do freezer meals and just haven't started because the thought of an all-day cooking event seems a little overwhelming. So having a stash of two or 3 dump recipes in your freezer each week may be just the thing you need to get your freezer meals started.

What are dump recipes?
Essentially, you take raw (meaning, never frozen) meat and place it into a gallon-size freezer bag. You could also use frozen meat, just make sure that you don't let it thaw and then try to refreeze it. That would just promote the growth of bacteria like salmonella, and you don't want to risk your and your family's health for the sake of a time-saving meal.

After putting your meat into the freezer bag, "dump" in a marinade or other ingredients that you want to cook with. This could be Italian dressing, barbecue sauce, chopped onion & minced garlic, bell peppers, lemon juice and lemon pepper...you name it. There are a ton of flavor combinations that you can use.

After dumping in your marinade/ingredients, seal your freezer bag and place in freezer. You'll need to allow it to thaw in the refrigerator for 24-48 hours, depending on how much meat & ingredients you've stuffed into the freezer bag. And if you used a sauce or liquid ingredient, then your meat will marinate in the fridge while it thaws (how convenient is that?!).

On supper day, simply "dump" the meat and ingredients into a cooking dish. This could be a baking dish, a crock-pot, a skillet, the grill...your choice!

How is are dump recipes a time saver? You cut out several steps that you won't need to do on cooking day--mixing together a sauce, marinating the meat, chopping vegetables...There were plent of times in the past when I had "intended" on making a meal, only to find out that I had to chop a ton of veggies, or I had to marinate the meat, and just didn't have time to wait, and I either rushed the meal preparation, or I gave up and made something else instead.

But if I had "dumped" the marinade or chopped the veggies ahead of time & "dumped" them with the meat into the freezer, then I would have saved a lot of time. A lesson that took me a long time to learn (and I hate to admit, still learning as I'm still kinda' incorporating dump recipes into my menu planning. :)

Some great sites out there with tasty dump recipes include Soopermom. She has quite a lot of dump chicken recipes that are really tasty & healthy, too. You can find 175 dump recipes at Recipezaar when you click here. And Lazy Day Gourmet, also a once a month cooking fan like me, posted a YouTube video on her blog about a dump freezer chicken recipe that might help you get started.

Good luck with your freezer meals!

Wednesday, August 19, 2009

Canning Tomatoes

We've picked a lot of tomatoes over the past couple days, so we decided to try making canned tomatoes. It was our first attempt, so I was a little nervous. While hubs was at his meeting tonight, I got started on the process. I apologize that I didn't think to take pictures of the first couple steps, so I'll try to describe as well as I can.

I used a canning recipe from the Ball Blue Book of Preserving. It had step-by-step illustrated instructions and was really helpful.

First and one of the most important steps is to get your canning supplies ready.

Place your jars into your canner after washing them (make sure you're not using any that have cracks or nicks). Cover them with water. Set your oven element temperature to medium-high heat. This will sterilize them and keep them good and hot. It will also get your water temperature to just under a boil, reducing the amount of them it takes for the water to reach the boiling state when you're ready to can. Also, place your lids into a saucepan over low heat (do not boil). Use the simmer setting on your stove. This will prepare the sealing copound on the rim of the lids.

(Not pictured, sorry I wasn't thinking): Using fresh tomatoes free of cracks & blemishes, wash your tomatoes. Place in a wire basket and put your wire basket into a large pot of boiling water. I used a double boiler specially-made for pasta. The pot the tomatoes sat in is actually a colander, so the water would drain out easily. After putting your tomatoes into the boiling water, blanche for 30-60 seconds. This quick boiling time will help loosen up the skins of the tomatoes for you.

After the 30-60 seconds of blanching/boiling time is up, pull out your colander or wire basket and immediately place your tomatoes into a large bowl or pan of cold water. Using a paring knife, slip off the skins and cut out the core.

The next step is kind of up to you. After peeling the skins & coring, you can leave the tomatoes whole or you can cut them in half or quarter them. Above are some of my tomatoes that are now skinless but still whole.

I went ahead and quartered all my tomatoes.

Next, place your tomatoes back into your pot. Here they are without water. I put them in the double boiler/colander to prevent burning.

Cover your tomatoes with water and boil. You could crush the tomatoes and cook them in their own juice, but the canning process is about twice as long. For a shorter canning time, use water instead. I had a stock pot that was already boiling with water, so I just put the double boiler/colander right inside so the tomatoes were "good to go!" For tomatoes canned in water, they'll need to gently boil for 5 minutes.

By this stage in the canning process, hubs had come home. My favorite show, Ghost Hunters, was about to come on, so he took over. It's the only show on TV that I care to watch, so I try not to miss it. But I managed to take some more pictures to help illustrate the process and was able to see the start of my show just in time. :)

It would definitely behoove you to buy a jar lifter. This looks like a modified set of tongs. It's designed to fit around your jars and lifte them out of your hot canner without burning you. Your jars, which were covered in water heating up on the stove, will need to be emptied of water and placed on a dish towel on your counter. The dish towel prevents your counter from getting burned by the hot jar. We had our dish towel and canning materials right next to the stove so everything was conveniently on-hand.

Use a ladel to scoop your tomatoes out of their pot and pour them through a canning funnel into your jars. The funnel helps keep the tomatoes & juice from splashing around.

Add 1 Tbsp of bottled lemon juice to each pint of tomatoes (or 2 Tbsp to each quart). The lemon is needed to correct the pH of the tomatoes to ensure all the little microorganisms are killed off during the canning process.

Add 1 tsp of salt. This step is optional, but it does season your tomatoes a little bit. We added sea salt since it's a healthier alternative to traditional table salt.

(Next steps not pictured, sorry): Pack your tomatoes in good into your jar, leaving 1/2-inch of headspace (that's the amount of space between the top of the water level and the top of the jar. If needed, add some water to your jar. Use a nonmetallic spatula and press gently against your tomatoes to get out any trapped air bubbles.

As soon as everything looks "good", use a lid wand to pull a lid out of the simmering pot of lids on your stove. The lid wand has a magnetic end, so it will easily grab a lid instead of your fingers trying it & getting burned.

Place the lid on the jar and screw down a band until it's fingertip tight. Use your jar lifter and place the jar back into your canner pot. Then repeat these steps with an empty jar until all jars are filled, or you run out of tomatoes.

Cover your canner with a lid. When hubs started filling the jars, I bumped the dial up to high to ensure the water would be good & ready when it was time for the water bath. After the water comes to a rolling boil, set your time for 40 minutes for pints, or 45 minutes for quarts.
My canner was this year's birthday present from hubs and the kids. It also functions as a pressure cooker, but I haven't had enough green beans or anything else in order to pressure cook anything this year.

My canner did, however, really come in handy for making pickles this year! We've made a couple batches of kosher dill (1st batch is pictured above) and hubs surprised me by using up the last of our cucumbers (we pulled up the dying plants right after picking the last cukes) to make bread & butter pickles earlier this week while I was at work.

After your canning time is done, turn off the heat, remove the lid from your canner, and carefully lift each jar out using your jar lifter.

Place the jars onto a dish towel on your counter. Leave about 2 inches of space between the jars to allow air to circulate and cool them off. Don't retighten the bands until the jars have cooled 12-24 hours.

It's really amazing when the sealing compound sets the lids. You'll hear them "pop!"

After your jars have cooled, check the lids for a good seal by pressing down on the lids. They should not flex if there's a good seal. Double-check by removing the bands and gently use your fingertip to try to remove the lid. If it doesn't flex and you can't lift the lid, then it has a good seal. Replace the band and label the lid. You can use a fancy label you print from your computer, or simply use a sharpie marker and write on the lid. The lids cannot be reused, so it won't hurt anything to write on the lid.

I can't wait until the morning comes to see if all my lids have set correctly. We learned that we could have packed the jars a little better with tomatoes (see picture above, all the tomatoes floated up towards the top). Oh well, you live, you learn. I think we did a good enough job for our first tomato canning experience. :)

Previous Posts